2. Scanning techniques
- Inspect the quality of the materials to be scanned. If the materials contain large number of damaged pages and/or unclear text (such as handwritten notes, blurry text, or highlighted text), then the materials may not be suitable for producing quality scanned versions. Consider looking for another copy, or manually inputting the text to create digital version.
- Check whether the scanner specification could support high resolution and sufficient contrast for high quality scanning and subsequent format conversion.
- Avoid crooked pages, shadows from the spine of bound materials (such as a book), unaligned pages, wrong orientation of pages, uncropped pages, reducing page size, or cut-off text.
- Try to ensure each page of the materials is properly aligned with the scanner glass and is flat against the scanner glass as much as possible by unbinding and/or applying manual pressure.
- It would help avoid crooked and unaligned pages with shadows from the spine of the bound materials. The curve or shadows would distort the page content. Unaligned pages may cut off certain parts of the text of the page.
- Scan the materials upright to prevent users from the need to rotate the pages.
- Consider cropping a double-page scan page into a single-page scan. It would avoid reducing the original size of the page content.
- An example of scanner for mobile device is the Adobe Scan Mobile App. It allows users to scan and upload the materials to Acrobat Pro DC for further editing and accessibility settings.
3. Optical character recognition (OCR) and proofreading
- Image PDF created by scanning the source documents is not a “searchable PDF” and the text content is not “real”. It is inaccessible to assistive technologies such as screen readers. Further procedures are needed to enhance the accessibility of the image PDF, such as optical character recognition (OCR) followed by tagging procedures.
- Searchable PDF means the text is searchable by shortcut keys like Ctrl + F. “Real” text means it is fully editable or selectable. The text can be selected and/or highlighted by cursor; copied and pasted.
- Searchable PDF is indeed more accessible to all users as they can more easily select, highlight, edit, or reflow the real text content in the PDF.
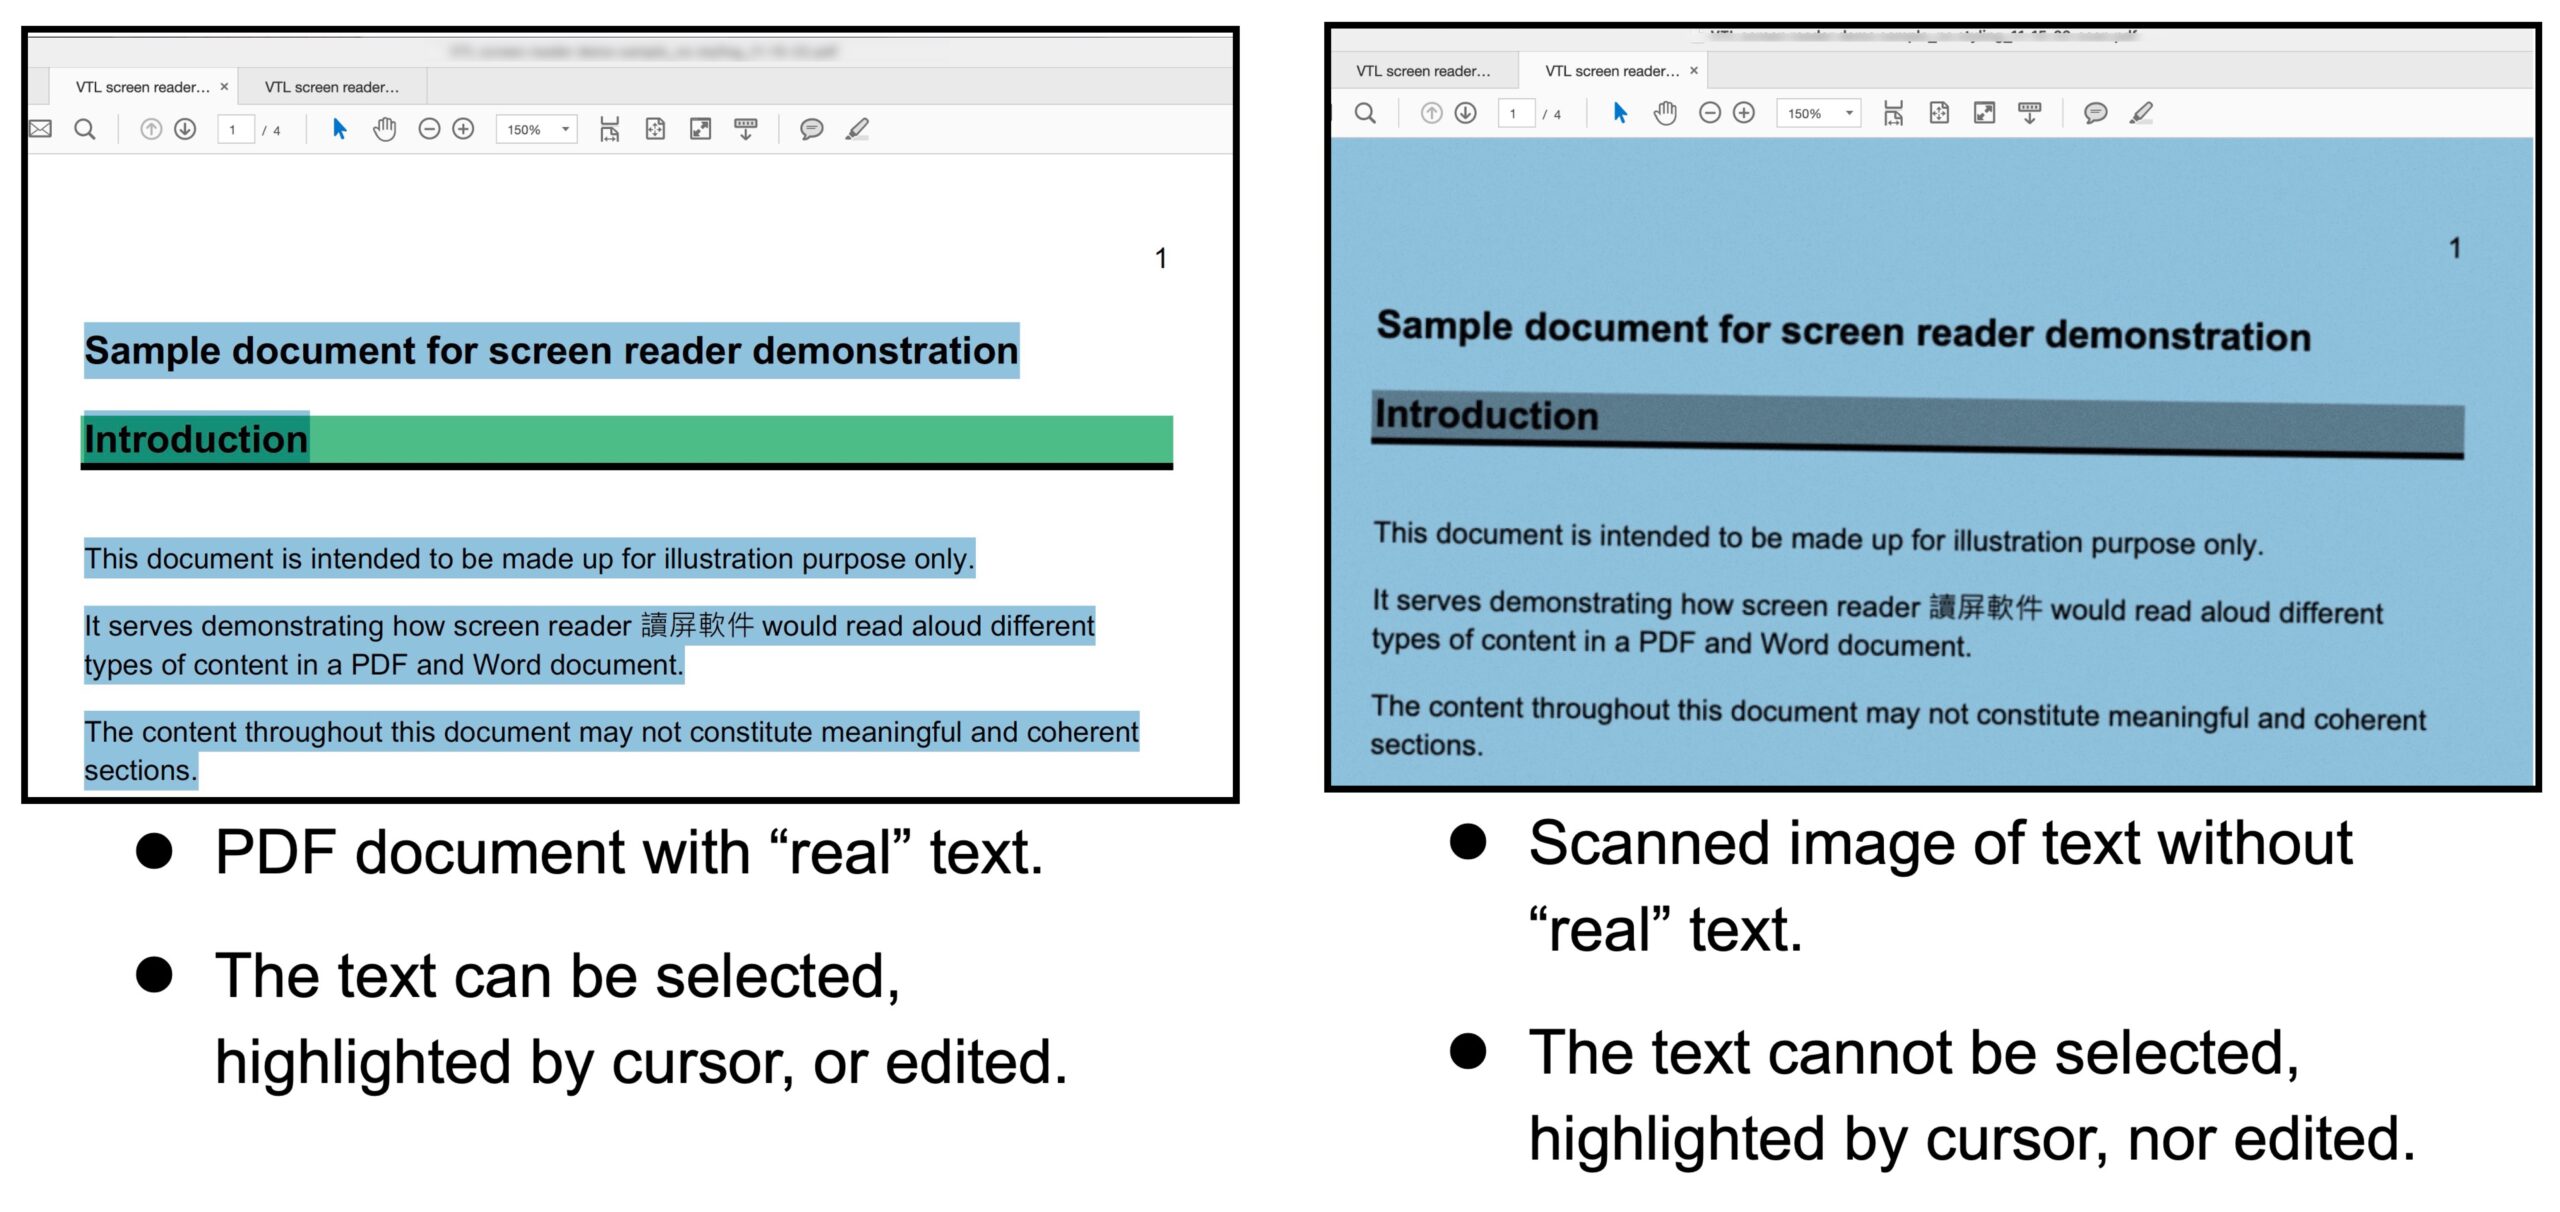
- Optical Character Recognition (OCR) is the process of converting images of text into “real” text that is searchable, recognizable, readable, and editable.
- In this section, we use Adobe Acrobat Pro in MacOS for illustrative purpose. The sets of commands may be slightly different across the types of PDF editing programmes and computer systems, but the general ideas still apply. The recommended practices are not exhaustive.
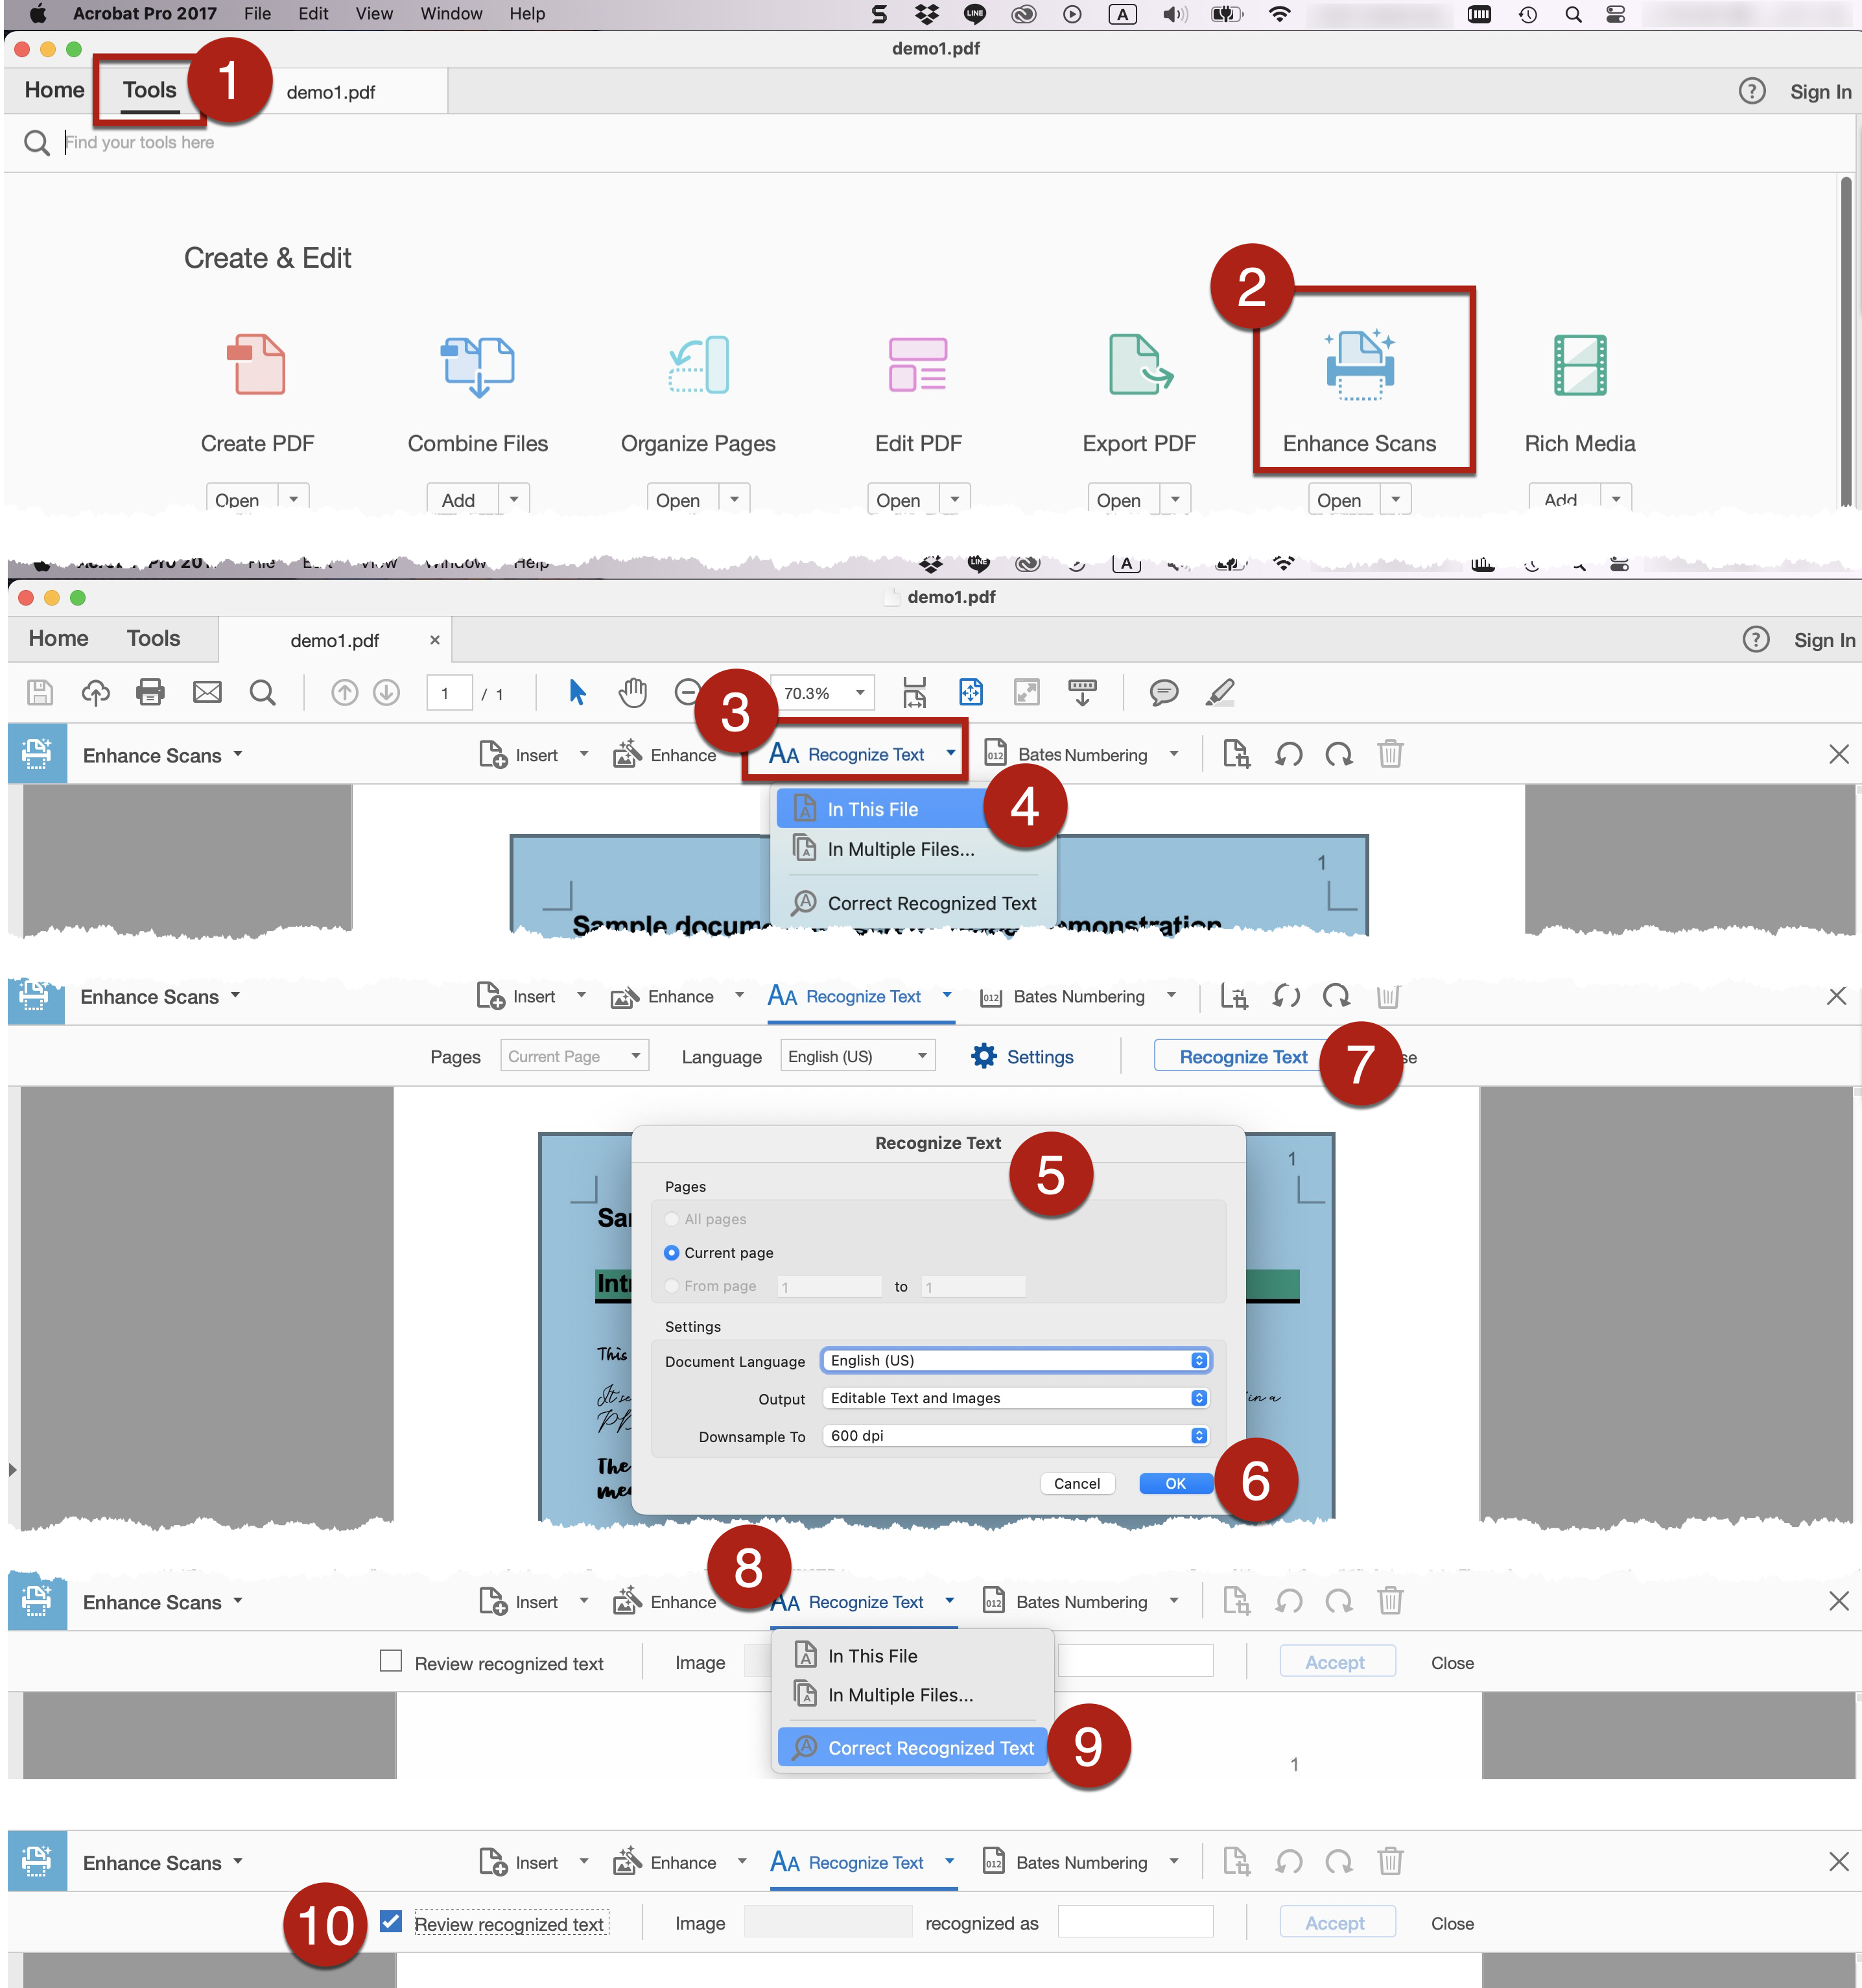
- To perform OCR in Adobe Acrobat Pro:
- Go to Tools > Enhance Scans or Scan & OCR > Recognize Text > In This File. Select In Multiple Files if you need to convert multiple files at the same time.
- Go to Settings > Specify the page range to be converted and document language. For the Output, select Editable Text and Images. Select OK.
- Select Recognize Text. Then OCR will begin. Note that the resulting text might not be completely correspond to the original text. The quality of the OCR depends on various factors, such as the quality of the scan and font (e.g., handwritten text might be more difficult to be accurately recognized).
- Proofread and fix the converted text in the resulting PDF. Select Recognize Text > Correct Recognized Text. Suspected characters are automatically highlighted. You may go through each suspected character one by one. Accept or fix the suspected characters as needed.
- Proofread and fix the converted text in the resulting PDF again manually.